
Introduction to the world of Mechanical Keyboard Modding
Welcome to the detailed guide on how to do Mechanical Keyboard Modding, featuring the Royal Kludge RK84. Are you curious why keyboard enthusiasts spend hours on modifications? Stick around to find out and get a step-by-step walkthrough of the process.
Why Modify?
Modifying a mechanical keyboard goes beyond personal preference. It’s about enhancing your typing experience, customizing the feel, sound, and response of your keys, and making your keyboard uniquely yours. The Royal Kludge RK84 serves as an excellent example for this transformation.
Step-by-Step Guide
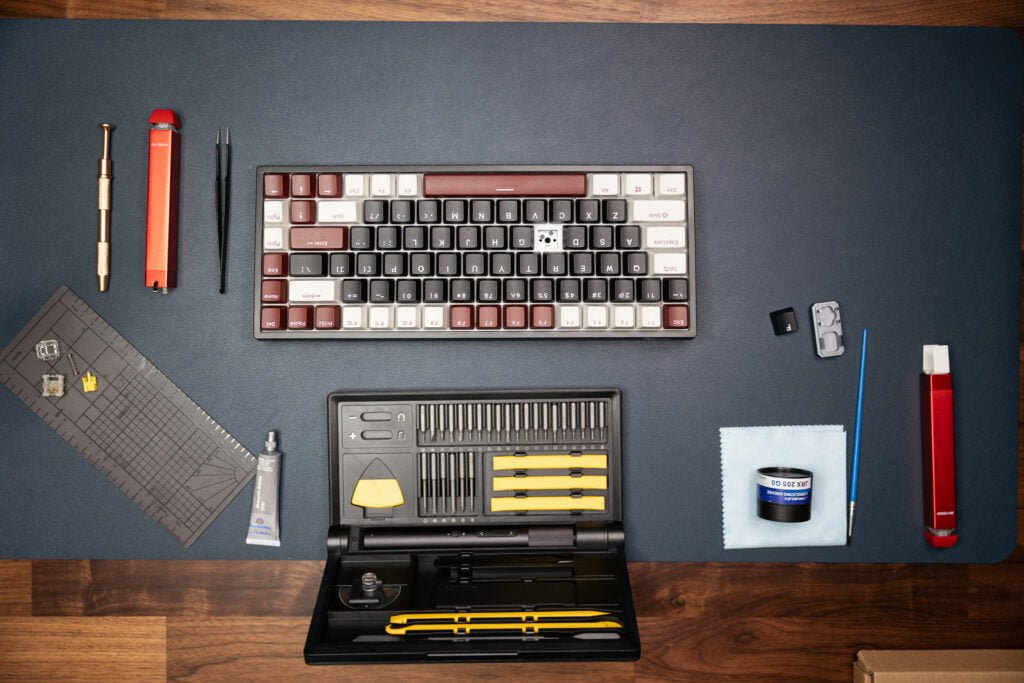
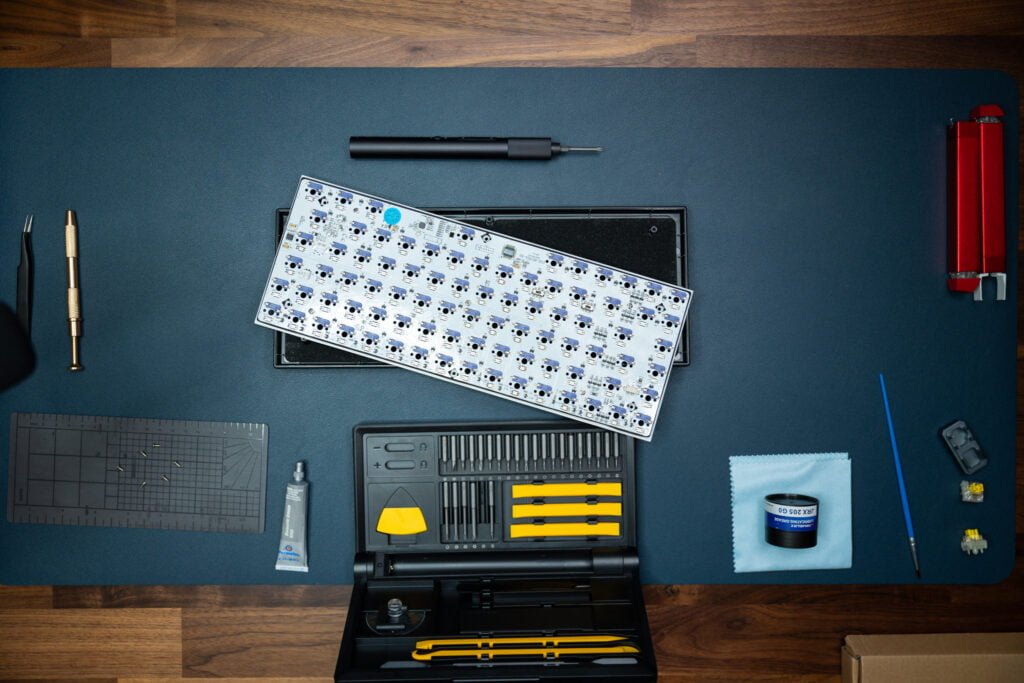
Preparation | What You Need as a Tool Set:
Gather your
and
painter’s tape
for modifications.
My set of tools, that I’m using for mechanical keyboard modifications:
YIMAGUJRX RUNJRX Keyboard Lube Kit – Link
YIMAGUJRX Keyboard Sound Dampening Foam – Link
HOTO Electric Precision Screwdriver Kit Pro – Link
Please check my initial review of the Royal Kludge RK84 keyboard, that we are using today as an example of the good structured mechanical keyboard.
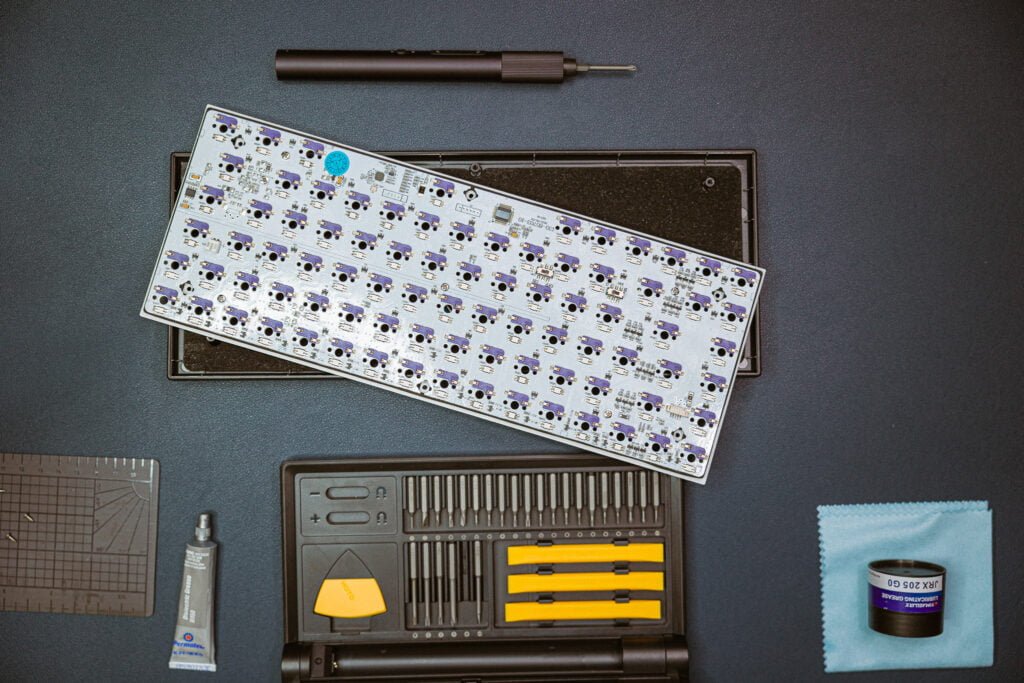
Step 1/10
Initial Sound Test:
Before diving into the Mechanical Keyboard Modding, conduct a sound test of your RK84. This will give you a baseline to compare the results after your modifications.
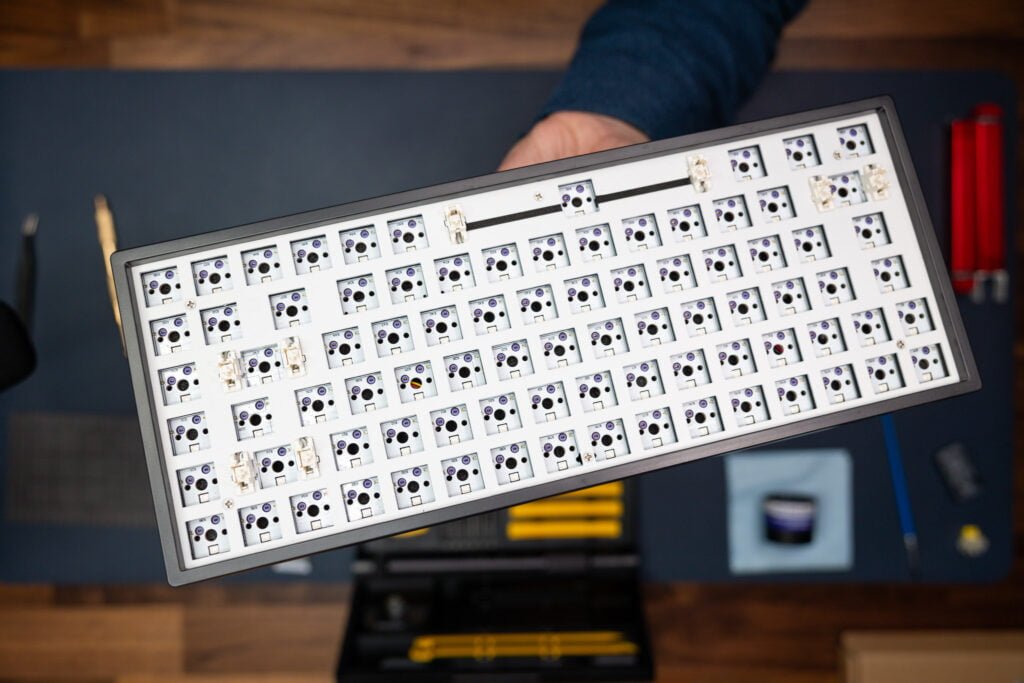
Step 2/10
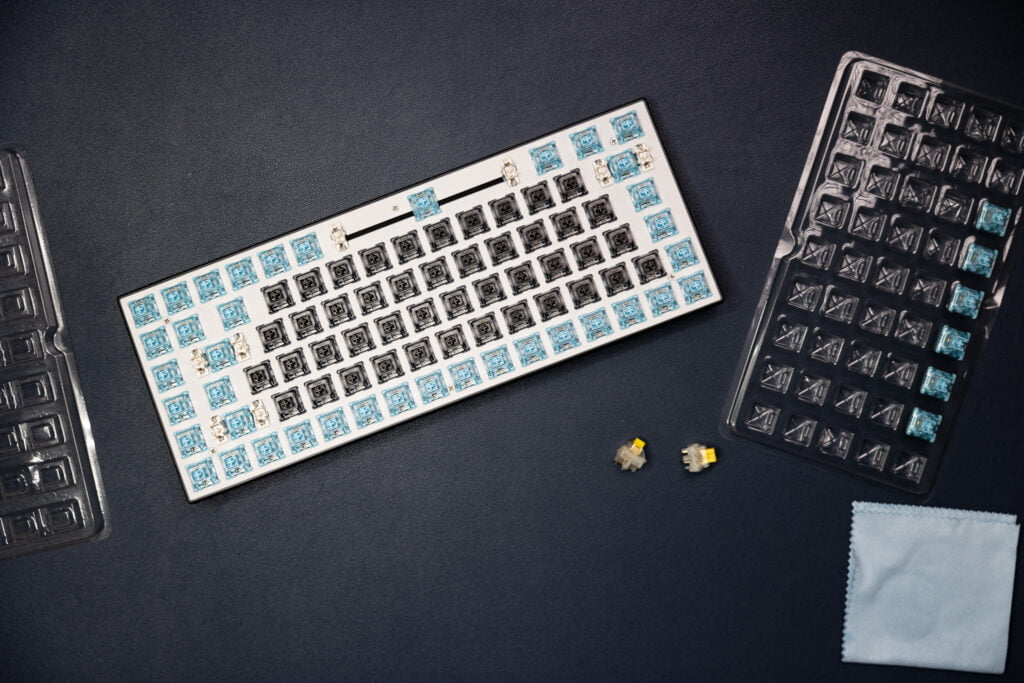
Keycap and Switches Removal:
Use the keycap puller to remove all keycaps and the switch puller for the switches. Familiarize yourself with the structure and types of keycaps and switches, as this knowledge will be crucial for your customization.
Keycaps: The Gateway to Customization
Structure of Keycaps:
- Material: Common materials include ABS (Acrylonitrile Butadiene Styrene) and PBT (Polybutylene Terephthalate). ABS is cheaper but prone to shine over time, whereas PBT is more durable and resistant to wear.
- Profile: Keycap profiles (the shape and height of the keycaps) vary greatly. Common profiles include OEM, Cherry, SA, DSA, and more. Each provides a different typing experience and aesthetic.
- Legend Printing: How the letters and symbols are printed on the keycaps. Methods include pad printing, laser etching, dye sublimation, and double-shot molding. Double-shot keycaps, where the legend is a separate piece of plastic, are particularly prized for their durability and clarity.
Types of Keycaps:
- Standard vs. Custom: Standard keycaps are those that come with the keyboard. Custom keycaps are aftermarket products designed to suit various aesthetic and tactile preferences.
- Backlit vs. Non-Backlit: Some keycaps allow for LED backlighting to shine through the legends or around the keys, enhancing visibility in low-light conditions.
- Artisan Keycaps: Handcrafted, often custom-made keycaps that can be thematic, character-based, or abstract. They are typically used for the Escape key or other non-alphanumeric keys.
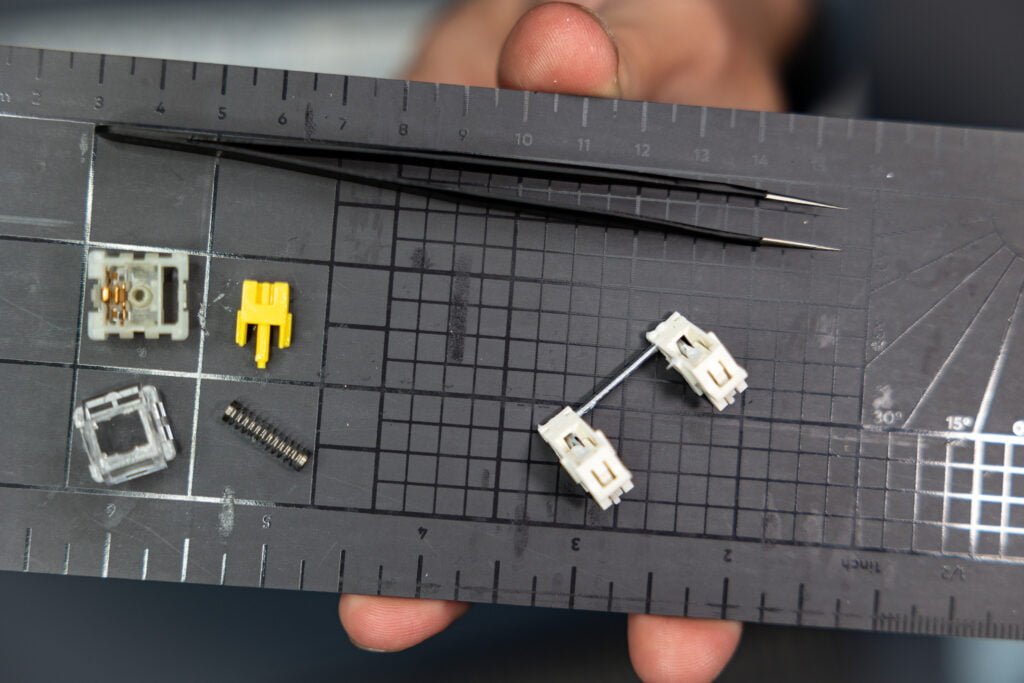
Switches: The Heart of Mechanical Keyboard Modding
Structure of Switches:
- Housing: The outer shell that holds all parts of the switch together.
- Stem: The part of the switch that moves down when a key is pressed. The shape and design of the stem determine much of the switch’s characteristics.
- Spring: Determines the force needed to press the key and the speed at which it returns to its original position.
- Contact Leaves/Metal Contacts: These register the keystroke when the switch is pressed.
Types of Switches:
- Linear Switches: Smooth and consistent keystroke with no tactile bump or click. Popular among gamers for their fast action.
- Tactile Switches: Provide a noticeable bump at the actuation point. Favored by typists for the feedback they provide.
- Clicky Switches: Similar to tactile switches but with an added click sound at the actuation point. They offer both tactile and auditory feedback.
- Optical Switches: Use light-based actuation, resulting in faster response times and longer lifespan.
Customization:
- Lubrication: Applying lubricant to reduce friction for a smoother keystroke.
- Spring Swapping: Changing the switch’s spring to adjust the actuation force.
- Stem Swapping (“Frankenswitching”): Mixing parts from different switches to create a custom feel.2
Step 3/10
Disassembling the Case:
Open the case carefully, noting the battery and USB-C Connection module. Remember, some components will be connected to the PCB, so handle with care.
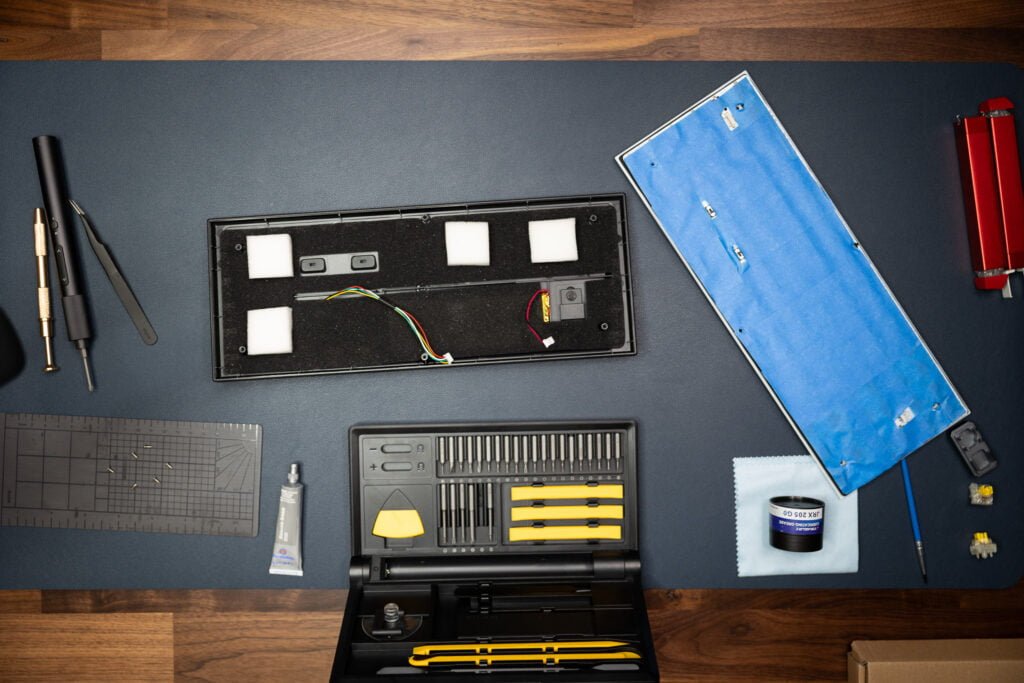
Step 4/10
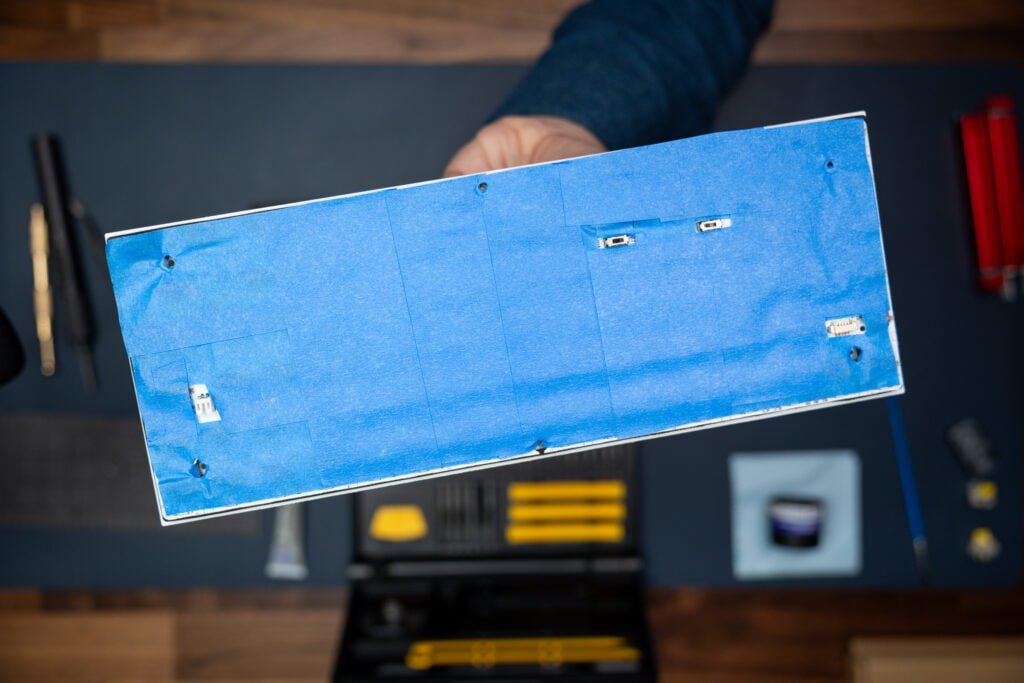
Painter’s Tape Mod (MOD 1):
Apply painter’s tape to the backside of the PCB main plate to reduce vibrations and enhance sound quality. Leave openings for screws and components.
Why Use the Painter’s Tape Mod?
Dampening Vibrations:
- Reduced Resonance: The backside of a keyboard’s PCB (Printed Circuit Board) can sometimes act as a resonating surface for the vibrations caused by typing. Applying painter’s tape adds a layer of damping material, reducing this resonance and, in turn, the hollow or echoing sound that can occur, especially in more cavernous keyboard cases.
- Improved Typing Feel: By dampening vibrations, the typing experience can feel more solid and less ‘rattly.’ This is particularly noticeable on larger keys or keyboards with metal or very rigid cases.
Enhancing Sound Quality:
- Smoother Sound Profile: The tape modifies the way sound travels and is absorbed within the keyboard, leading to a more muted and pleasant typing noise. This is especially sought after by users who prefer a quieter, more subdued sound.
- Consistency: It can help in achieving a more uniform sound across all keys. Without such modifications, some keys might sound markedly different from others, especially if the keyboard has an uneven case or plate design.
Ease and Reversibility:
- Non-Permanent: Unlike some other modifications, applying painter’s tape is not permanent and can be easily removed or adjusted without damaging the keyboard. This makes it an excellent option for those new to keyboard mods or those who like to experiment with different setups.
- Accessibility: Painter’s tape is widely available and affordable, making this mod accessible to virtually anyone without the need for specialized tools or materials.
How It Works
- Material Properties: Painter’s tape is slightly dense and has a non-conductive adhesive backing. When applied to the PCB, it adds a thin layer of cushioning. This layer absorbs some of the vibrations generated from typing, rather than allowing them to reverberate through the keyboard’s case.
- Application: When applying the tape, it’s important to leave openings for screws, standoffs, or any components that need to interact with the case or other parts of the keyboard. This ensures that the tape doesn’t interfere with the keyboard’s functionality or cause any undesired pressure points on the PCB.
- Layering: Some enthusiasts use multiple layers of tape to increase the dampening effect. However, it’s a balance – too much can dampen the sound excessively or affect the feel of the keyboard, while too little might not produce a noticeable effect.
Step 5/10
Case Foam Mod (MOD 2):
Add foam to the interior of the case to reduce empty space and improve sound quality. This Mechanical Keyboard Modding approach is particularly effective in reducing echo and hollow sounds.
Why Use the Case Foam Mod?
Reduction of Echo and Hollow Sounds:
- Absorbing Sound: Keyboards, especially those with larger or metal cases, can produce a hollow or echoing sound when typed on. The foam acts as a sound-absorbing layer inside the case, reducing reverb and echo, which makes the typing sound more solid and muted.
- Consistency: Foam can help in achieving a consistent sound across the keyboard by minimizing the varying acoustic properties of different parts of the case.
Improved Sound Quality:
- Deeper, Thockier Sound: Many enthusiasts prefer a deeper, ‘thockier’ sound when typing, as opposed to a higher-pitched, ‘clacky’ noise. Foam helps in achieving this by dampening higher frequency vibrations.
- Customizable Acoustic Profile: Depending on the type and thickness of the foam used, you can subtly change the sound profile of your keyboard to suit your preferences.
Vibration Dampening:
- Stabilization: Foam fills up the empty space inside the keyboard case, which can reduce the amount of vibration and movement of internal parts when typing. This leads to a more stable and solid feeling when pressing keys.
- Reduced Resonance: By filling up the hollow spaces, foam lessens the case’s ability to resonate, which can significantly improve the typing experience on metal or hard plastic cases.
Enhanced Typing Feel:
- Cushioned Bottom Out: Foam can add a slight cushioning effect when keys are pressed all the way down, providing a softer bottom-out feel. This is particularly noticeable on keyboards with a plate that allows for some flex.
How It Works:
- Material and Placement: The foam used for this mod is typically a dense, closed-cell material like neoprene or EVA. It’s cut to fit the interior shape of the keyboard case, usually placed between the PCB and the bottom case. Some people also place a thinner layer between the PCB and the plate for an even more dampened experience.
- Thickness and Density: The effectiveness of the foam mod can vary based on the thickness and density of the foam. Thicker, denser foam will provide more dampening and sound absorption, but too much can make the keyboard feel unnaturally muted or affect the keypress feel.
- Precision Cutting: It’s important to cut the foam accurately to fit around standoffs, screws, and internal components. Improperly placed foam can lead to pressure points on the PCB or misalignment of the case when reassembled.5
Step 6/10
Reassembling the Case:
Carefully reassemble the keyboard, ensuring all parts are correctly placed and functional.6
Step 7/10
Stabilizers Check (MOD 3):
Examine the stabilizers, especially for larger keys. Lubricate them if necessary to ensure smooth operation.
Why do stabilizers Mod?
1. Improving Key Stability and Consistency:
- Reduced Wobble: Without well-tuned stabilizers, larger keys can wobble or feel uneven when pressed, especially on the edges. Modifying stabilizers ensures each keystroke is stable and consistent, regardless of where on the key you press.
- Even Presses: Properly functioning stabilizers ensure that when you press one side of a large key, the other side descends at the same rate, providing a uniform and satisfying keypress.
2. Enhancing Typing Feel:
- Smoother Operation: Lubricating the stabilizers can significantly reduce the friction between the moving parts. This results in a smoother, more pleasant keypress, free from scratchiness or stickiness.
- Customization: Some users prefer different types of stabilizers (e.g., cherry-style, costar, or screw-in) for their feel and sound. Modifying stabilizers allows users to choose the type that best fits their preference.
3. Reducing Noise:
- Quieter Typing Experience: Stabilizers can be a source of rattling or metallic pinging noises in a keyboard. Properly tuning and lubricating them can significantly reduce these unwanted noises, leading to a quieter typing experience.
- Dampening Mods: In addition to lubrication, various modifications like clipping or band-aid mods can further reduce the sound produced by stabilizer movement and impact.
4. Preventing Long-Term Wear:
- Lubrication: Regularly lubricating stabilizers can prevent the wear and tear of plastic parts rubbing against each other, ensuring a longer lifespan for your keyboard.
- Maintenance: Checking and maintaining stabilizers can prevent issues like sticking or binding keys, which can develop over time with regular use.
How It Works:
- Lubrication: Apply a suitable lubricant (like dielectric grease or Krytox) to the parts of the stabilizer that come into contact with each other, including the housing, stem, and wire.
- Clipping: Some enthusiasts perform a ‘clipping’ mod on certain types of stabilizers (like cherry-style) to remove the small legs on the bottom of the stabilizer stems, resulting in a firmer bottom-out feel.
- Band-Aid Mod: Applying a soft material (like a small piece of band-aid) where the stabilizer clip hits the PCB can soften the landing, reducing noise and creating a softer feel.
Step 8/10
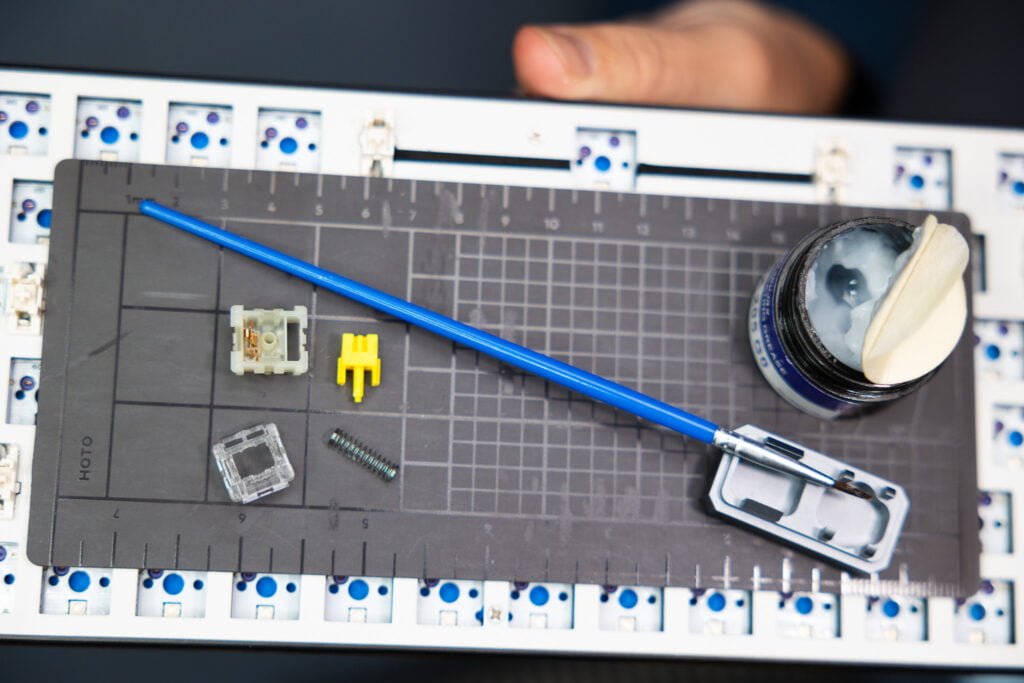
Switch Lubricating (MOD 4):
Disassemble and lubricate your switches, focusing on the rails and springs for a smoother typing experience.
Why Lubricate Switches?
Smoother Keystrokes:
- Friction Reduction: The moving parts within a switch, primarily the stem sliding against the housing, can create friction. Lubrication minimizes this, allowing for a smoother keypress. It’s especially noticeable in linear switches where the uninterrupted glide is paramount.
- Consistent Feel: Even application of lubricant across all switches ensures each key feels uniform when pressed. This consistency is crucial for typists and gamers alike, where the feel of each keystroke matters.
Noise Reduction:
- Quieter Operation: Switches can produce noise from the friction and impact during use. Lubricant acts as a buffer, softening the sound produced when the switch is activated or bottoms out. This results in a significantly quieter keyboard.
- Dampened High-Pitched Sounds: Certain switches, like clicky ones, inherently produce a sharper sound. Lubrication can help reduce this, leading to a deeper and more pleasant auditory experience.
Enhanced Typing Feel:
- Tactile Smoothness: For tactile switches, lubrication can refine the bump, making it feel more rounded and less abrupt. This doesn’t eliminate the tactile sensation but enhances its quality.
- Linear Perfection: For linear switches, the goal is often to achieve a buttery-smooth keypress. Proper lubrication is key to this, eliminating any scratchy sensations.
Increased Longevity:
- Wear and Tear Protection: Regular use can lead to wear on the plastic components of a switch. Lubricant reduces the direct contact between these parts, prolonging the switch’s life.
- Prevention of Binding: Well-lubricated switches are less likely to experience binding or sticking, which can occur over time with dirt accumulation and wear.
How It Works:
Disassembly and Application:
- Disassembly: To lubricate a switch effectively, you’ll need to open it up to access the stem, spring, and housing. This allows for precise application and ensures that all friction points are addressed.
- Strategic Application: Apply a thin layer of lubricant to the areas where there’s contact — the sides of the stem, the bottom housing where the stem slides, and the spring. It’s crucial to use just enough to coat the surface lightly without making it overly greasy.
Types of Lubricants and Techniques:
- Lubricant Choices: There are various lubricants available, each with its characteristics. Thinner lubricants like Krytox 105 are often used for a less dampened feel, while thicker ones like Krytox 205g0 provide a more substantial dampening effect.
- Technique Matters: The method of application can significantly affect the end result. Using tools like a small brush can help in applying a consistent, thin layer. Some enthusiasts also lubricate the spring separately to eliminate any pinging noise.
Aftercare and Maintenance:
- Regular Checks: Over time, lubricant can spread or collect dust. It’s a good idea to periodically check and possibly re-lubricate switches, especially if you notice changes in sound or feel.
- Cleaning: If you’re re-lubricating used switches, ensure they’re clean and free from debris or old lubricant for the best results.8
Step 9/10
Switch Upgrade
Consider upgrading to different switches, like the AKKO V3 Pro, to match your typing preference. Ensure compatibility with your keyboard’s PCB.
Step 10/10
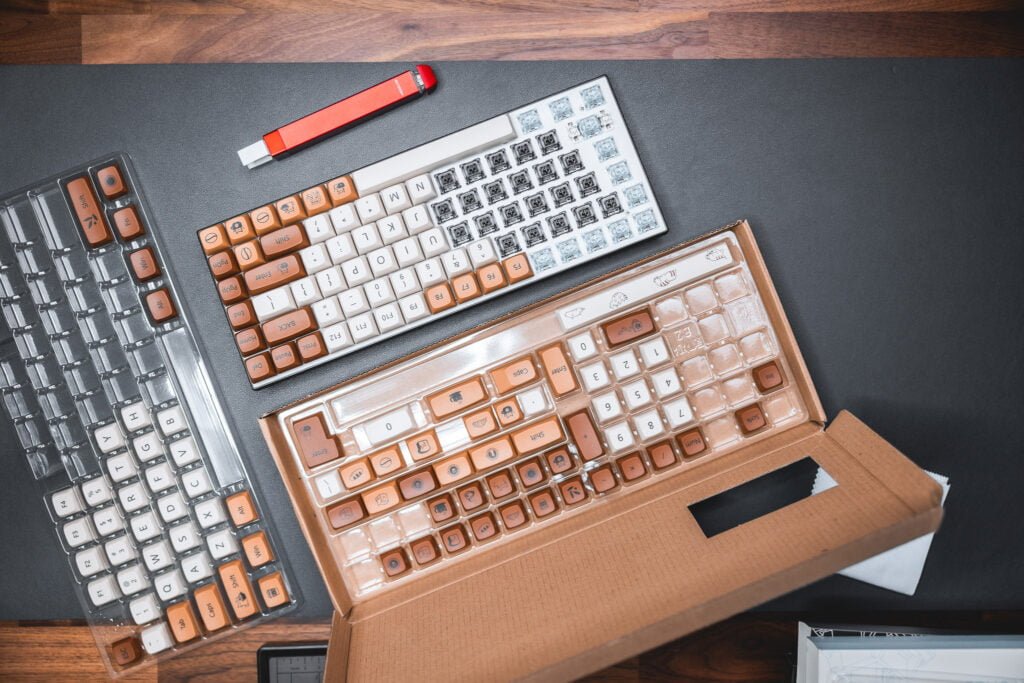
Keycaps Upgrade
Replace your keycaps to something that fits your style. This is not just an aesthetic upgrade but also can affect the feel of typing.
Final Thoughts
After reassembling and testing your modified keyboard, you’ll understand why Mechanical Keyboard Modding are so valued. It’s about creating a tool that’s uniquely yours, enhancing your daily interactions. Whether you’re new to the world of mechanical keyboards or a seasoned enthusiast, this guide aims to help you embark on your modification journey with confidence and creativity.
If you are looking for where to order this keyboard, check this out:


Pingback: Royal Kludge RK84 – It’s a True GEM in your collection! -